Welcome to my multi-part series on how I built a fully capable and advanced train tracking app from scratch, what I learned along the way and the challenges I faced all while I was just 14 years old when I started. In this article, I will cover how the idea came about and how I made my first proof of concept.
Series Contents
What was wrong with existing apps?
For the first few weeks of the new academic year, everything was going well (except when I took the wrong train home on the first day!). I felt like I had a lot more freedom. But after a couple weeks, I started to realise that the National Rail Android app was not very good. As soon as I first saw it, I knew that it wouldn't be amazing, as it looked like an app straight out of 2011, but it did the job for the most part, even if it was old and slow.
Then a friend recommended the Trainline app to me, which is the most popular train travel app in Europe. I downloaded it and started to use it; however, although it looked much more modern, it didn't solve the issues that I had with the National Rail app, primarily accurate location tracking. In fact, I believe it was worse. You see, the ideology behind Trainline was to provide cheaper, faster, and better tickets. The founders were driven by the need to make the ticketing system more accessible to more people and easier to use.
Crucially, I believe they have achieved that goal, but despite the dedication and hard work, it is no longer enough. Train times have become even more unpredictable over the years for a variety of reasons, meaning that the train apps themselves have to stay vigilant, dynamic, and, most importantly, user-friendly.
The Idea
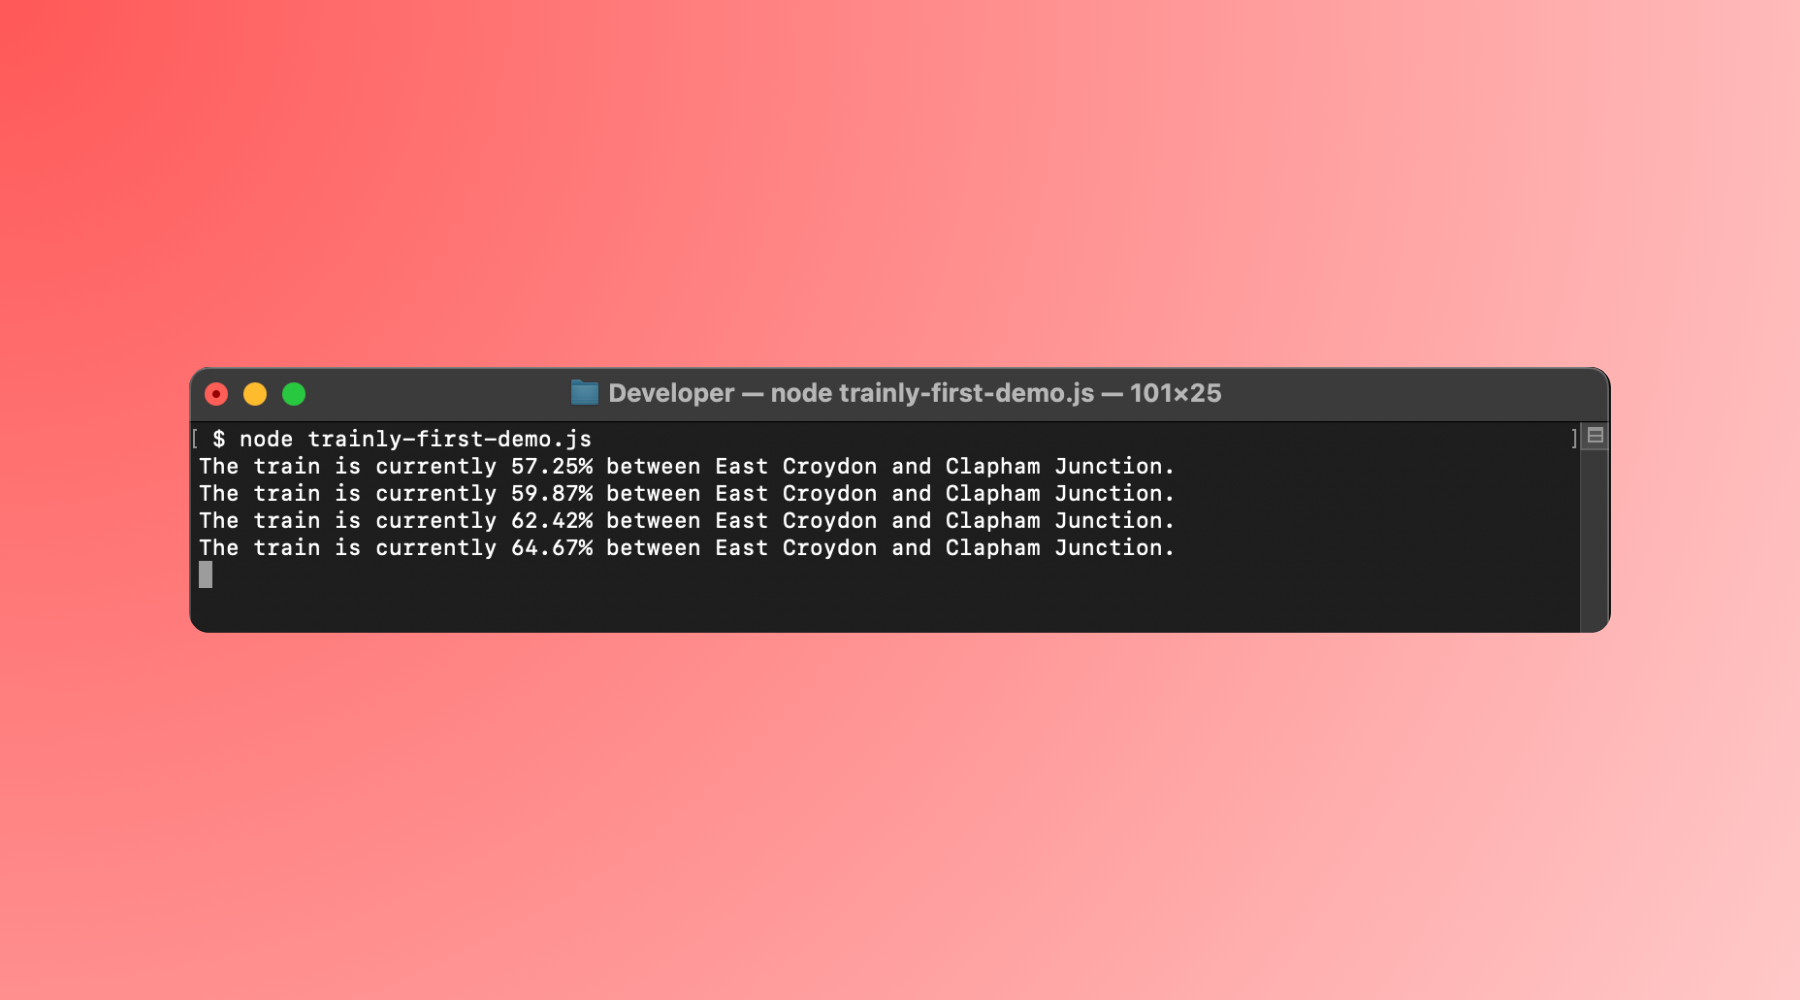
As a little bit of fun and a challenge for myself, I looked online to see if the train movement data was publicly available. I figured that with the departure and arrival times for trains, I could just calculate the percentage of time that has passed from a departure to an arrival and estimate the location of a train on the network.
Thus I found myself stumbling upon the Live Departure Board Webservice (LDBWS), originally a SOAP API that needed an upgrade (more on this below). This was the first step to building Trainly, although in my eyes it was just going to result in a simple terminal script that outputs the rough location of the train.
I vividly remember getting on the train with my friend after that weekend, feeling really excited because I knew exactly where the train was (as shown in the article cover image)! He did not share my excitement with me but supported me nevertheless. It was then I had the idea to turn it into an app for mobile phones. This started my journey into mobile app development for both Android and iOS.
Proof of Concept
(be warned: this section is technology heavy!)First, I signed up to National Rail's OpenLDBWS service (the legacy version I used can be found here but the new one can be found here) which was a SOAP API that I could query for information. Using the documentation, I made my first request for live train information.
Then, using a train ID pulled very crudely from the old National Rail train search website URL, I could easily query the live expected times and the scheduled times across its entire journey. This now allowed me to guess-timate how far along a train was between two station.
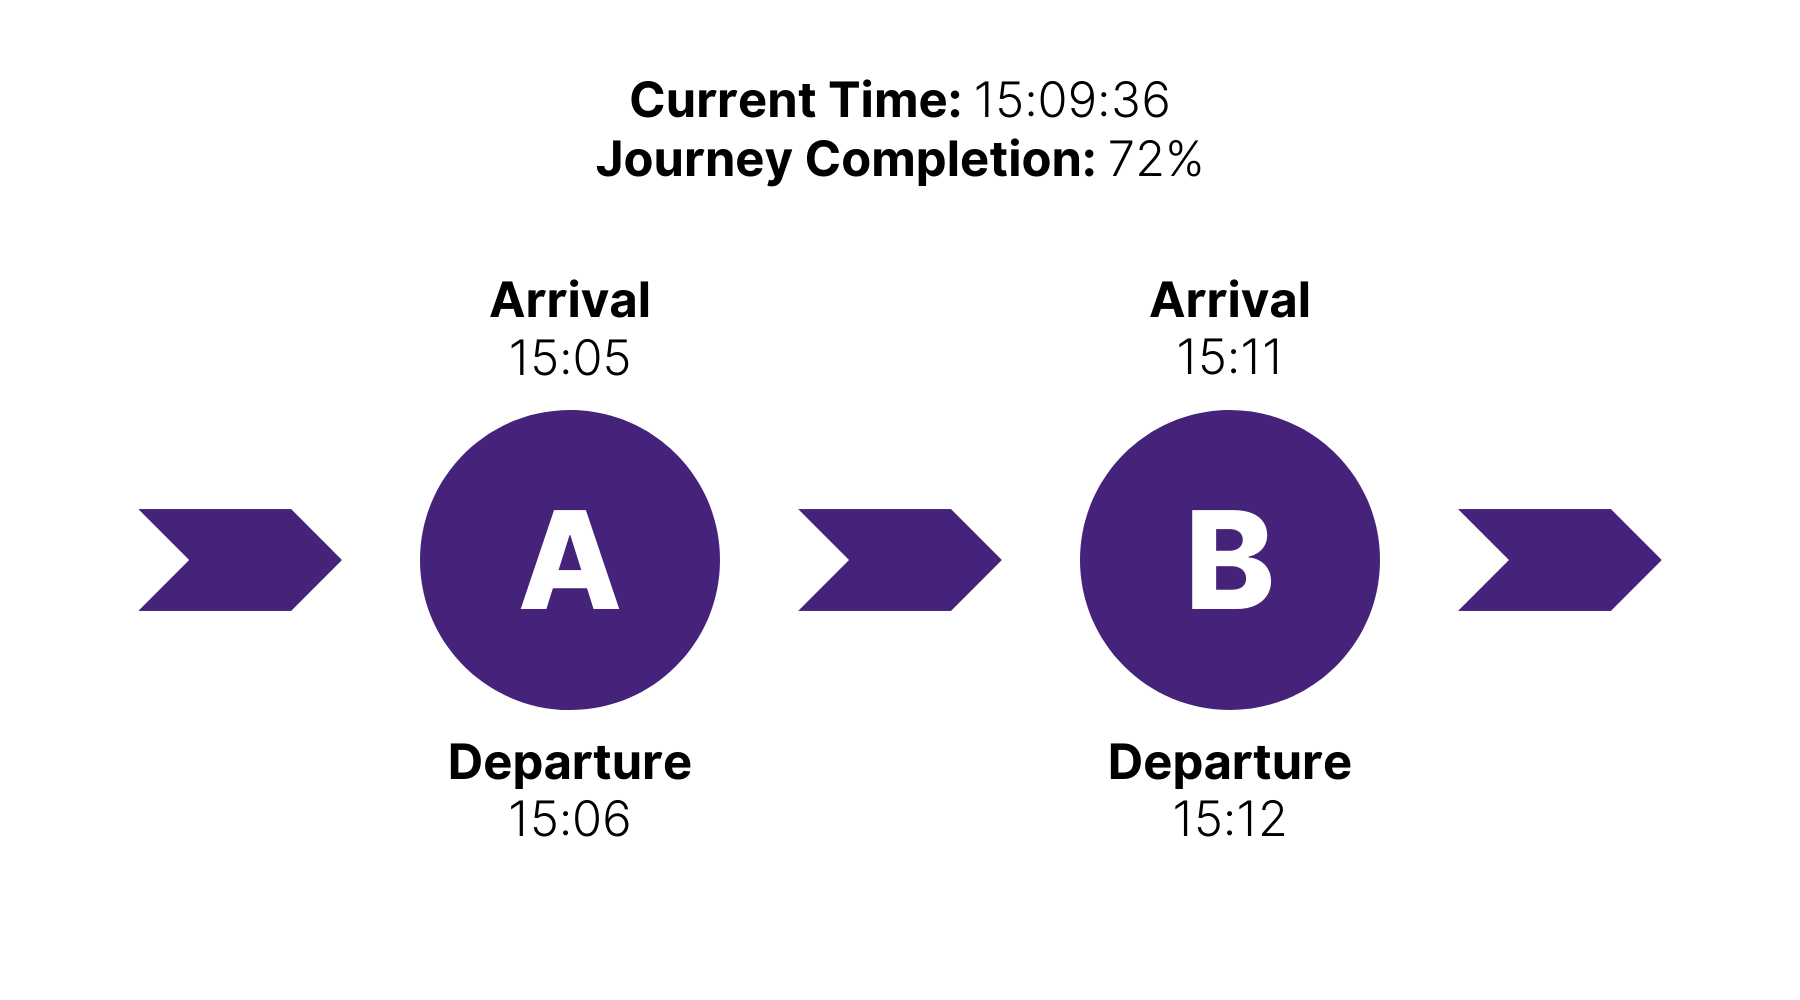
I was able to do this using a method called 'Time Interpolation', whereby I take the time the train left the last station and the expected time it will arrive at the next station and calculate the difference. Using the current time, I can calculate what percentage of the journey the train has completed between those two stations. In the image below, the train has departed station A and is currently 72% along its journey calculated using the shown current time and the arrival & departure times. This is essentially the basis of Trainly's original tracking system.

However, while this worked well for a fun party trick, this way of estimating the location has a few glaring issues.
To start with, this method does not take into account any geographical data nor does it link to the train's GPS system. This means that if we were to plot this location on a map, the speed would seem to remain constant between the two stations.
Secondly, the resolution of the live data is 1 minute. Now, a train travelling at 125mph covers just over 3.3km in 1 minute which is a huge distance to be off by and quite frankly guessing where the train is on a map would have a similar accuracy to that.
Lastly, the API was slow. And I mean painfully slow. To an everyday person, an API call taking 4 or 5 seconds might not seem like a lot, but to have more accurate data means to have more queries and having to wait 5 seconds between each call was not ideal, especially the fact that an expected time could easily change in those 5 seconds.
These were all problems I set out to solve, and you can read about how I did so in Part 2!
Thanks for reading, and I hope you have an amazing day!
As a final note, you can find all my original (but horrible!) code here.


